Showing posts with label kitchen. Show all posts

Friday, July 12, 2013

Old Bottles & Irises

One day while exploring through the woods at my mom's house, my husband and I came across a bunch of old jars and bottles buried beneath the leaves. I was sooo excited...what a find.  I picked up as many as I could carry in my arms since  we were pretty far from her house and it was all up hill, but I'm planning on returning to the "gold mine" with something other than my arms to carry bottles.

It took lots of soaking and washing to get them clean, but finally....they were...well, almost clean.  I put them in the window in our pantry/laundry room so I could see and enjoy them when I am doing the laundry.


So, when some of my purple Irises were blooming, I thought they would be pretty in these old bottles sitting on my kitchen counter.  Irises are beautiful, big flowers and these light purple were so pretty.


Sometimes, the simple arrangements are the prettiest.  We get to enjoy each flower apart from the others.


I hope you have a super-fantastic weekend.  I'll be coming home from the beach tomorrow... so a little sad, but excited that I have a lot of new ideas to share.

I'm Sharing with these Beautiful Blogs:

Tuesday, May 28, 2013

Retired Ladder

Okay, what do you do with an old, rickety ladder that's been around a long time and served you well but can no longer can keep up? (literally, can no longer keep me up...lol.) 

I thought and thought of different ways I would use this old thing.  Hang plants on it?  No, that wasn't it.  Towels?  No, not that either...not really the right style.  I know.  Use it to put a few of my favorite books on, my garden hats and some garden trinkets. 
It's always fun to do something new and unexpected at the beginning of Spring.  Going into my kitchen is this little entry way that was perfect for this little old ladder.  Every time I go into the kitchen and see it, it reminds me of all the weeds that need to be pulled.  But what the heck, I'll open one of the books instead.


I love the shape of this little green urn.  It is super heavy and I found it at a Miracle Hill store.  Also, one of my favorite books to get inspiration from is Junk Style by Melanie Molesworth.  I've had this one many years and never tire of it.

The bag the gardening magazines are in came from the Home Exchange party I had last month.  It is one of the things I chose.  It matched perfectly with this little group. 

 Mr. Bunny used to be on the front porch but now is peeking through the small fern.  Maybe he needs a little Shakespeare.


 Just for the time being, I think I'll like this little niche.  I need a little gardening motivation.  Happy Hump Day!  


Tuesday, May 7, 2013

Kitchen Tour

It all started with my beautiful copper kitchen sink.  That's right...the kitchen sink.

I have loved this copper sink.  It catches the light from the window and shines, shines, shines.   This sink has lead me on a year long search for a copper tub to hold my potatoes under my cutting block.  Well guess what?  This past week I found it and it has a beautiful patina already.


Here's a photo of the built-in cutting block it sits below.  This cutting block has been so handy to have.  The mirror above it sits directly across my large window over my sink, so when I'm standing there cutting, it's as though I were looking out the window.


Since I started sharing with you some of my kitchen, and it's been a while since I've first blogged about it, I thought I'd share it with you again.  

I love all the white.  It's so bright and airy.  My window seals are made of the same black granite as the countertops and the large window over the sink is painted black.  I love this European feel.  


I love how the light is coming in through the above photo on the fern and coffee cups.  So warming.  

Above our wine cooler is Mr. Man. I keep fresh flowers in him and he keeps me company when I making supper, although he doesn't have much to say...lol.


The door beside Mr. Man leads to a large pantry/back porchI'll share the porch with you another time. 

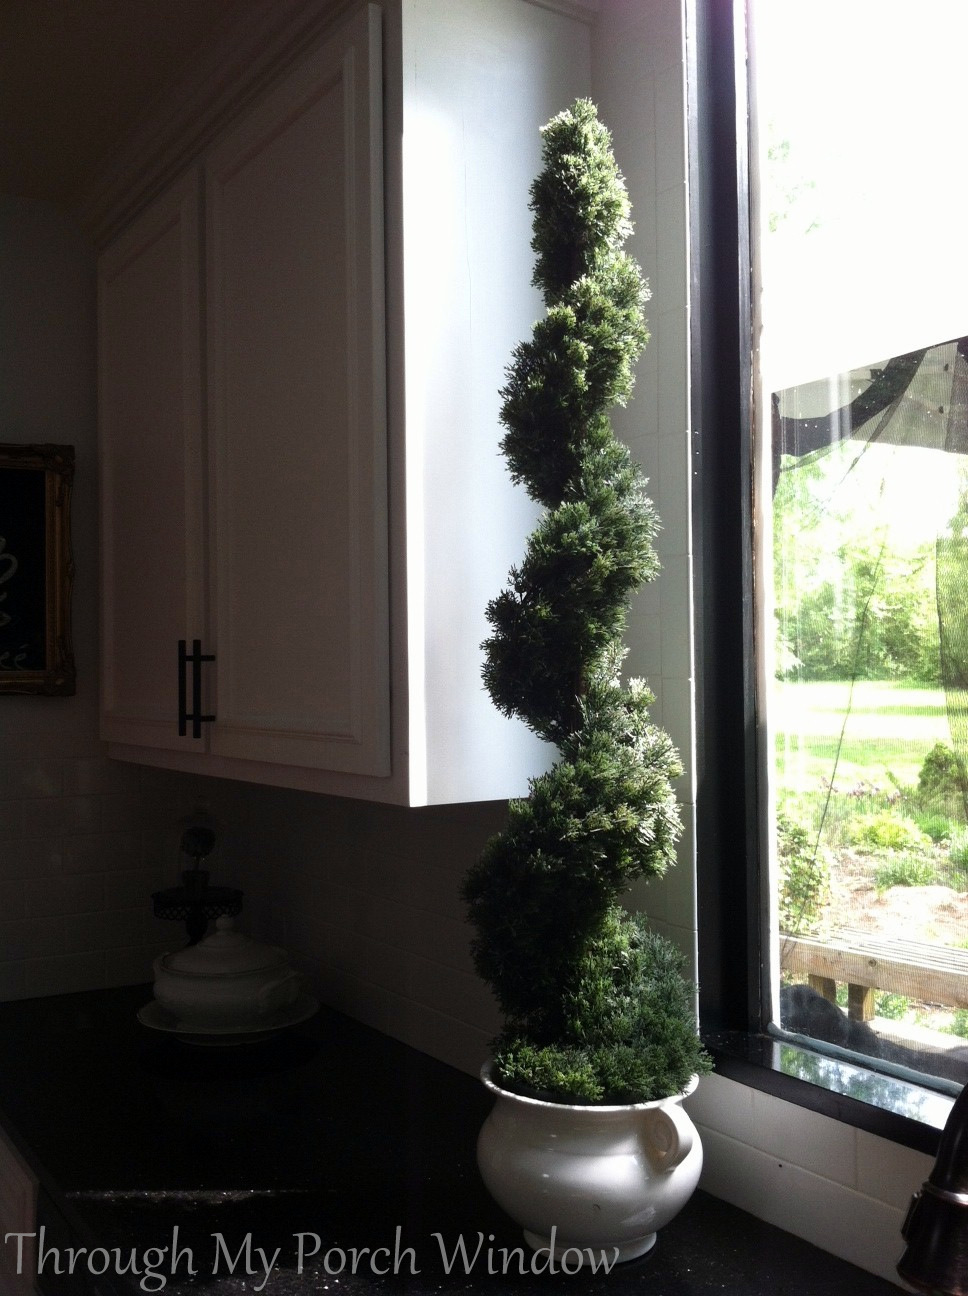
Looking the opposite way from Mr. man is the other end of the kitchen which leads to our deck.  I found this large topiary several years ago and it's been sitting where it is now ever since.  I sometimes decorate it for the holidays .

Thanks for stopping by my kitchen.
  Hope to see you on Friday for Friday Finds.


Wednesday, February 13, 2013

Kitchen Lamp

Ok, sometimes I admit that I get lucky.  I'm out thrifting,  looking for something specific, and find just what I had been searching for.  I've been looking a while for just the perfect little lamp for my kitchen and voila!, there it is in front of me in my favorite home consignment store.


Aren't the color's just perfect with the painting?

 You can make your own crackle finish on just about anything.  It is easy and pretty inexpensive.  All you need are two colors of acrylic paint,a  couple of foam paint brushes and Elmers glue.

1.  Paint whatever you are working on the first color of paint.  (I prefer a darker color here).  Let dry.
2.  Paint in long strokes the Elmers glue (pretty thick) on top of this.   You can water this down to get a smaller crackle like on my lampshade.  If you like a large crackle, don’t water down at all.
3.  When almost dry, tacky to the touch, paint on your top coat (you can water this paint down as well to get whatever effect you want) and watch the magic.  Let dry.

That’s it.  Pretty easy huh?  Practice on a scrap piece before you begin your project to make sure you have the look you are going for.

Below are a few photos I found on Quakerrose.com of a crackle finished bed, and a small plaque.  Aren’t they pretty?


I have also painted my own diamonds and bands on several things.  I like to use a metallic paint found at Hobby Lobby.  Tape off where you may want a band and paint this first, let dry completely or when you paint the diamonds it will peel off, then tape your diamonds using painters tape.  That's it.  Simple to turn a plain lampshade into something really cute, or you can be lucky like me and find one already painted.  lol
 

Friday, January 25, 2013

Winter Twigs

I knew several days ago that we would have freezing rain and wintery mix and because of the unusual warm temperatures in this area, some of our spring bushes already have buds on them. This is at least one month early.  I did not want the freeze to get these beautiful flowers so I did a little research on forcing buds into bloom indoors and went about snipping a few twigs.  This 1st photo is the Flowering Quince in my back yard and it is just beautiful.  The next  few photos are the twigs I took off the bush and put them in water on my kitchen counter.


I love this man vase.  He looks cute with all sorts of plants and flowers for his hair.  The twigs will continue to bloom for a couple of weeks.
  
Instead of waiting for warm weather,  you can hurry the season along by forcing some twigs. Forcing is when you cause plants to flower earlier than they would in nature.  The best way to force twigs is to cut long branches from a flowering shrub or tree, bring them indoors, and place them in water.

Good plants to try include forsythia, dogwoods, pussy willows, apple, cherry and flowering quince, peaches, and crabapples.


It is better to use a floral additive to make sure you do not get any nasty bacteria in the water and it is easy to make your own.
In a gallon of water put
4 tablespoons of real lemon juice
2 tablespoons of sugar
½ teaspoon of  bleach

You will need to  change the water at least 2 times a week.

I posted some photos I found online of beautiful flowers others have forced indoors.

It's so cute to use a mason jar as a vase and the lip on the jar holds the twigs upright in a good position.

I also love to force bulbs on the counter.  My brother-in-law gave me paper whites at Christmas and they were just beautiful.  You can force just about any bulb indoors and they are so fun to watch grow.


This is the vase I used to grow my paper whites.  The bulb fits perfectly into the top and it is neat to see the roots growing in the water.  Try forcing bulbs or twigs yourself, you'll be pleasantly surprised.


Tuesday, January 22, 2013

Composting

It’s time to start thinking about Spring coming up and what better way than to talk about Composting. I just got a new compost bin for my kitchen, from World Market,  and I love it.  It will hold about a weeks worth of compost and doesn’t smell because it has a charcoal liner.
Here are a few other kitchen composters I saw online.  There are so many to choose from that will match any style of kitchen.


The one on top is made from plastic bins that held coffee with holes drilled into the top.  Composting keeps your organic waste out of your local landfill, and makes a wonderful soil. Composting is easy, too. If you’ve never had a compost bin before, you might be surprised at how much satisfaction you get from seeing vegetable scraps, coffee, tea grounds and lawn clippings turn into rich, fertile soil, and it helps make your vegetable garden and flowers beautiful.  

 Listed below are the things you can compost.
Fruit and vegetable wastes - peels, skins, seeds, leaves
Egg shells
Coffee grounds (including paper filters), tea bags, used paper napkins
Corncobs - should be shredded to make them break down quickly r
Yard waste
Grass clippings

Leaves
Pine needles
Weeds
Woody materials (branches, twigs)
Straw or hay
Newspaper


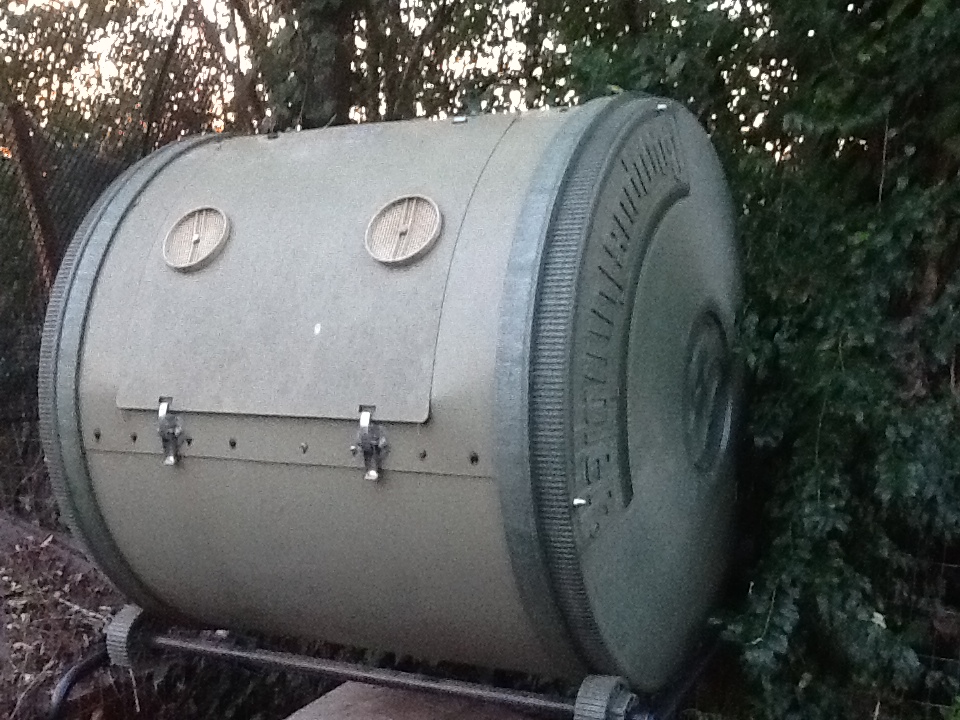
Next is a photo of my outside tumbler composter.  When the kitchen one is full, I simply empty it into this large one, add a little hay or grass clippings, close and tumble.

I've also added photo's of what other's use to compost.  The possibilities are endless and can be very simple and decorative.  Just use your imagination.  What good this does our earth.


 Add water regularly during the compost-building process, about the wetness of a sponge.
Speed the process by turning the pile with a pitchfork once a week or if you have a tumble one like I do, just flip it.  Mixing it allows oxygen into the center of the pile, encouraging the growth of bacteria which will break down organic material. 
That’s it.  I know it may sound labor intensive, but believe me it isn’t.  Compost your scraps, add them to the outside pile with clippings from your yard, water and turn occasionally and you’ll have beautiful soil for your planters.  Happy gardening
.